DIY Picture Frames
DIY Picture Frames
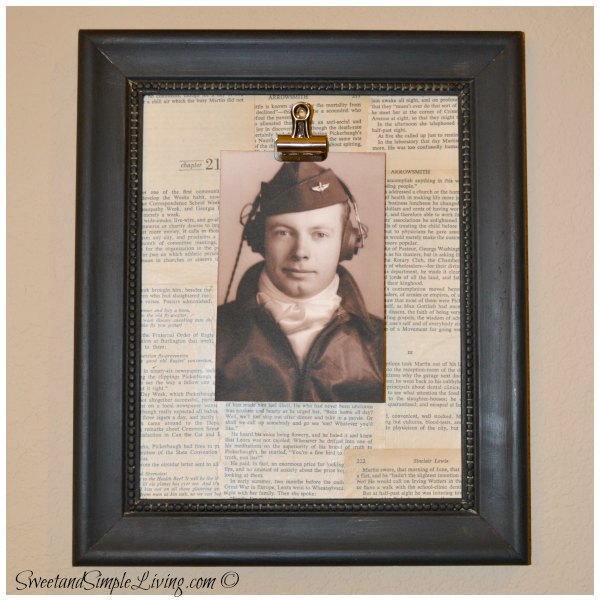
Got some old frames hiding in a closet somewhere? Dig them out and try creating these DIY Picture Frames. It’s also a terrific way to upcycle a thrift store find, like I did. The clip makes it easy to change the photos out often. The book page background provides awesome texture and makes a great way to display historic family photos of days gone by.
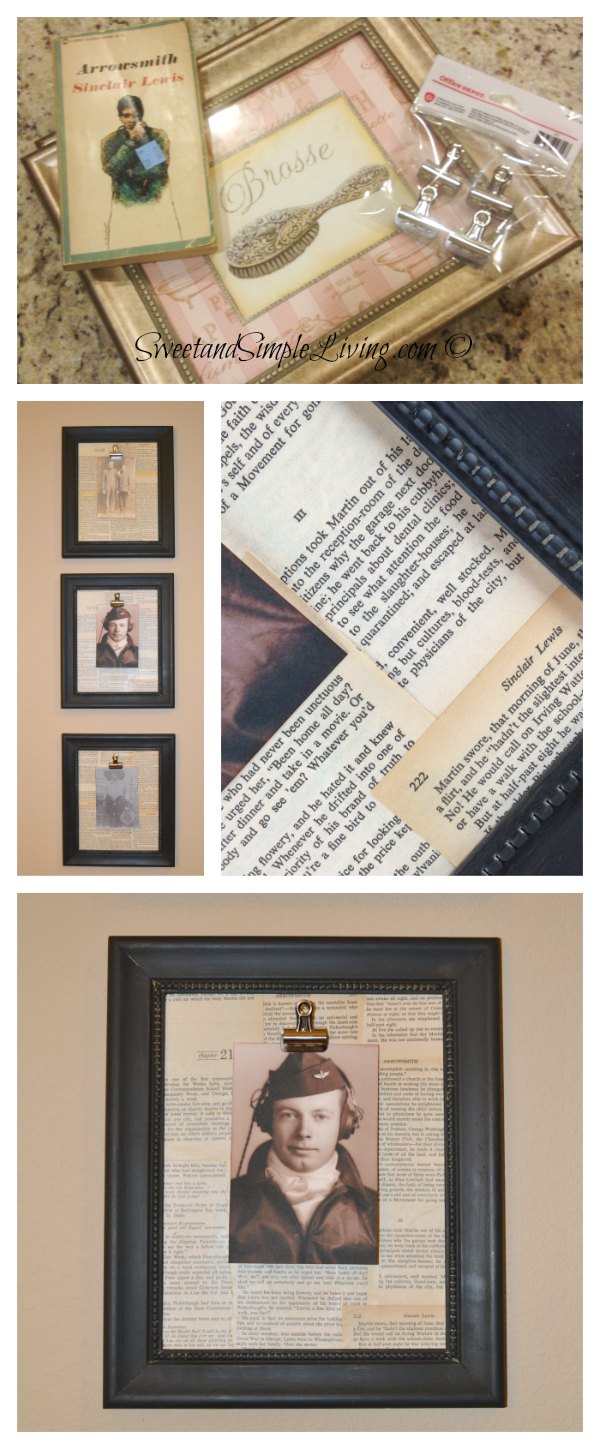
We moved last May and I don’t have much wall space in my kitchen but I wanted something different. Not the normal chef or food decor. I’ve also been trying to figure our somewhere in our new house to display some historic family photos. This idea filled both of these needs. When the idea finally formed in my head I knew it was time to head to the thrift store for some frames. I love wondering the thrift stores here in the Austin area. The things I have found and at such great prices! I really lucked out this time too because I found three frames that matched and they were only $2.99 each and a nicely “aged” paper back for 99 cents.
This project is very simple and there’s a good chance you may have the supplies on hand. Here’s what you’ll need:
- Frame
- Paint
- Old Book
- Matte Mod Podge
- Paint Brush
- Bulldog Clip
- Scissors
- Glue (I used Gorilla Glue brand super glue)
Start by disassembling the frames. If you use traditional picture frames taking out the glass and cardboard backing is simple. If you use nontraditional frames like I did, ones that are actually pictures, not frames, then tear off the paper back and use a screwdriver or something similar to pry back the large staples that hold the cardboard and glass into the frame.
Once the frames are apart, paint it whatever color you like. I chose black. You can use craft paint or latex you would use on your walls.
While the frames are drying, tear several pages from your book and lay them out over the cardboard backing you removed from the frame. Once you’ve gotten it laid out in a way your happy with it’s time to adhere it. If you want the torn edge to end up on top/showing you have to pay attention to the order you put the pages down in. I wanted mine pretty random so I just went with it and added extra layers to get the look I wanted.
To adhere the pages to the cardboard paint Mod Podge on the cardboard and then stick the page down. Repeat until the cardboard is covered. Let dry.
Then paint a coat of Mod Podge over the whole book page covered cardboard. Let dry then trim the excess off with scissors.
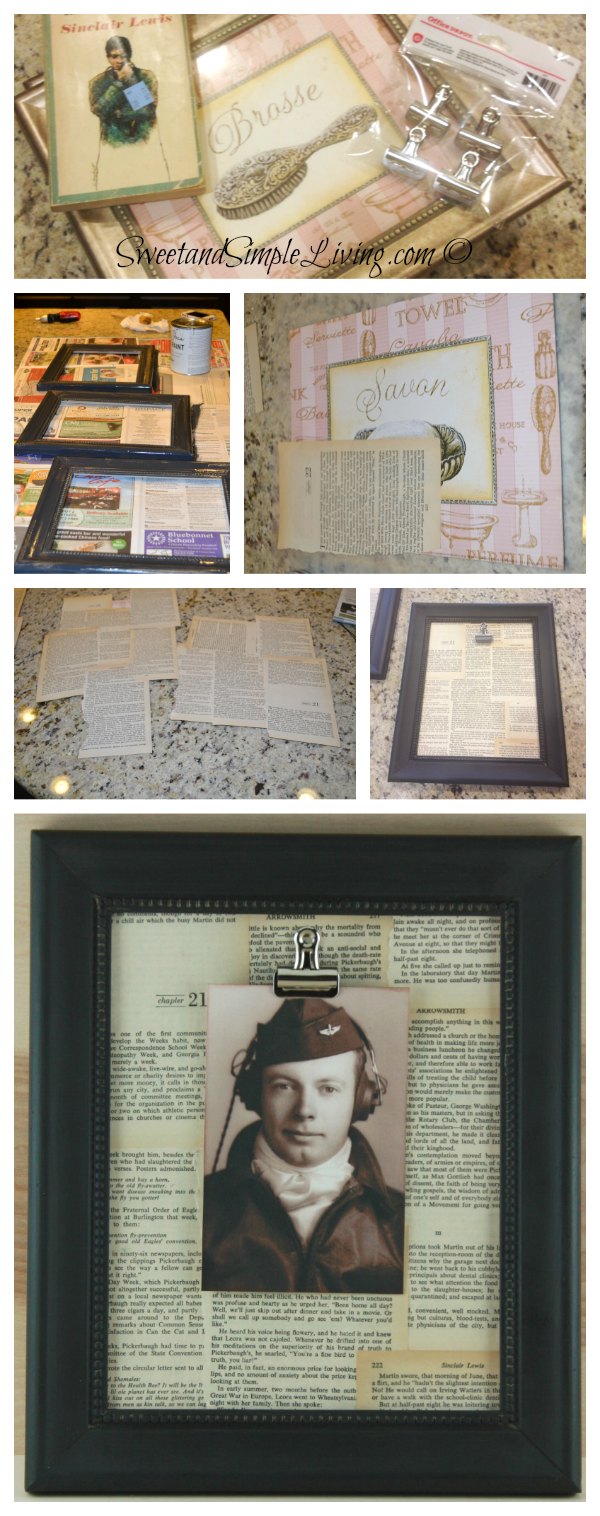
Put the cardboard backing back into the frame (don’t put the glass back in) and secure. Glue the bulldog clip in place and let dry.
Now you’re ready to add a picture and hang on the wall or add to a shelf display.
Looking for more crafty ideas? We’ve got plenty on our Crafts page.
Click +1 Below

This is a really fun project to create a vintage-looking picture frame! I have some old books and picture frames around, so I think this is something I could pull off. I like that it’s easy to change out photos as well! Just out of curiosity, did you use the Sinclair Lewis book as a background for any significant reason?