
Paper Punch Storage
Paper Punch Storage
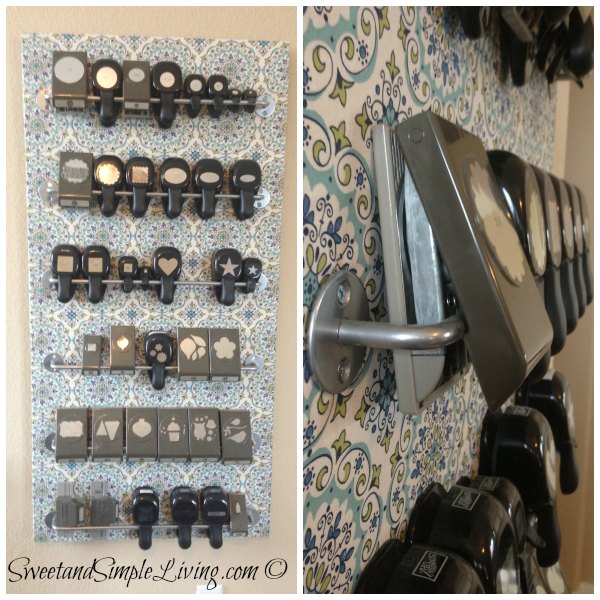
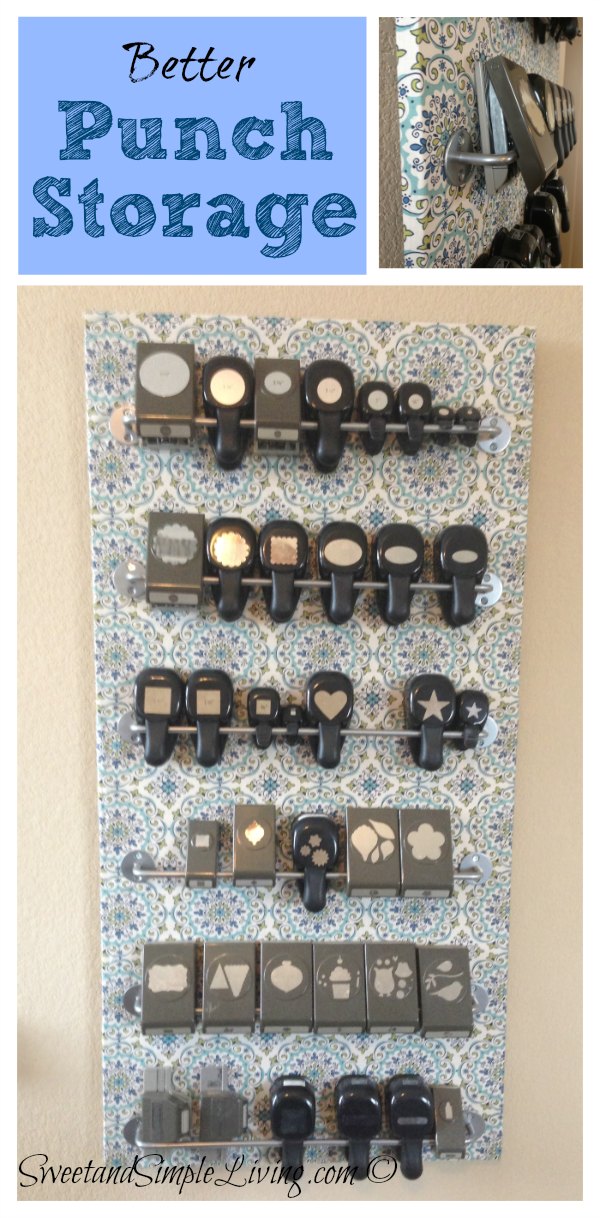
If you’re like many crafters, myself included, you like to have your tools out where you can see them and within arms reach. For years I’ve been storing my paper punches on rods attached to the wall and this worked great. Except when I decided to rearrange my craft room and had to fill the many large holes left from my punch storage bars. After rearranging my craft room (always to fit more stuff in it) and moving to an entirely new house I decided to improve upon this already terrific idea. Rather than screwing the bars directly into the wall I attached them to a thick piece of plywood and attached that to the wall. So if I decide to move things around I only have two holes to fill total instead of the usual two holes per rod.
We all know how heavy paper punches are so this has to be built well but carpentry skills aren’t necessary. Here’s what you’ll need to get started.
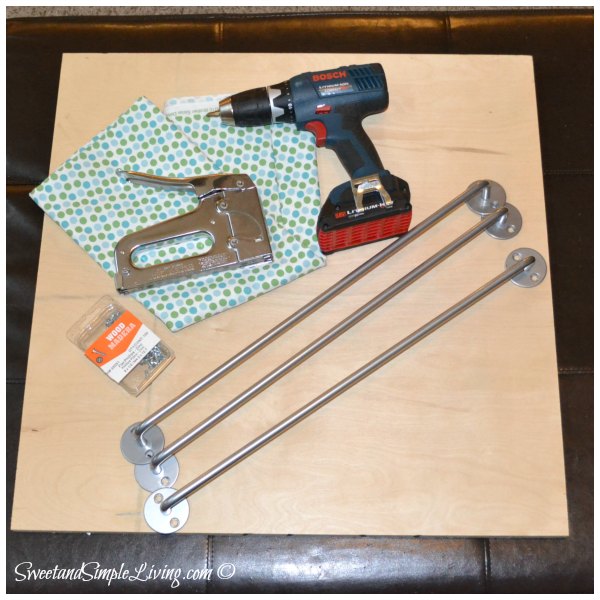
- Towel Bars/Curtain Rods (These one’s are from Ikea. If you’re not lucky enough to have an Ikea near you I think these towel bars would work well.)
- 1/2″ or thicker plywood
- Wood screws
- Drill
- Fabric
- Staple Gun
- Level
While I do own the tools to cut a large sheet of plywood it is a pain to transport it home from the hardware store. Instead I purchase their precut plywood. At Lowe’s it comes in 2′ x 2′ and 2′ x 4′ pieces. In today’s tutorial I’ll be demonstrating with the smaller size, but the pictures of the finished one are of the larger. I have so many punches I need both. If you’re hardware store doesn’t carry these precut pieces they will probably cut the plywood for you.
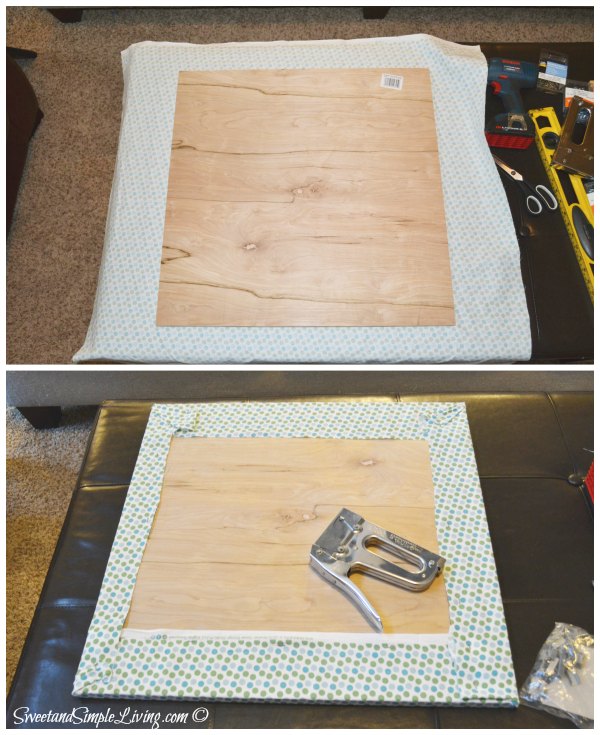
To begin wrap the fabric around the plywood and use a staple gun to hold it in place.
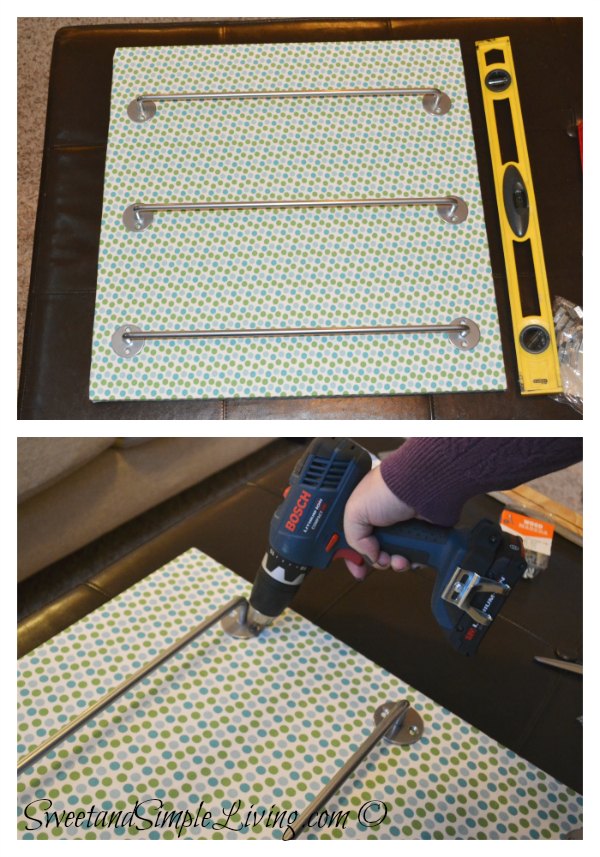
Flip the board over and attach the bars. On the 2′ x 2′ board I place the first bar about 5″ from the top (to the center of the bar) and each bar has about 8″ in between it and the next one. The spacing between bars is very important because you want to have enough room to easily slide/pull out one punch, without it hitting and knocking off another. I speak from experience on this one.
Also be sure the bars are level.
Now your paper punch storage board is ready to be hung on the wall. Remember once this board is full of punches how heavy it will be. I wouldn’t doubt if my large one weighed close to fifty pounds. I prefer to hang mine on the wall with what is called a french cleat. Creating one of these does require a circular saw or table saw set to a 45 degree angle.
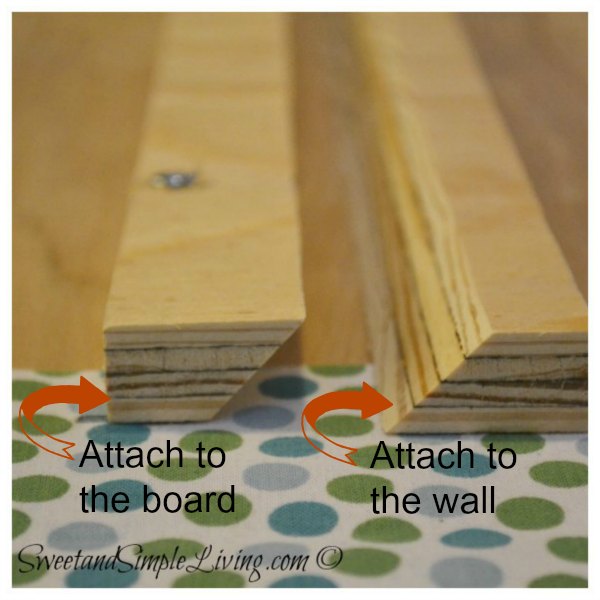
A french cleat is simply a board cut in half lengthwise at a 45 degree angle. One half is screwed to the paper punch storage board and the other half is screwed to the wall. Then the paper punch storage board hangs on the cleat on the wall.
Alternately you can screw the board straight into a stud or use drywall anchors. If you’re not sure about this consult someone at the hardware store for the best way to hang this on your wall.
Looking for projects to use you’re newly organized punches? Check out our Crafts page.
Click +1 Below
Love the idea for the punch storage. I am currently creating a craft/sewing room in one of my spare
rooms, I will be using this idea for my room. Thank you.