Upgraded Dresser to Entertainment Center
Upgraded Dresser to Entertainment Center
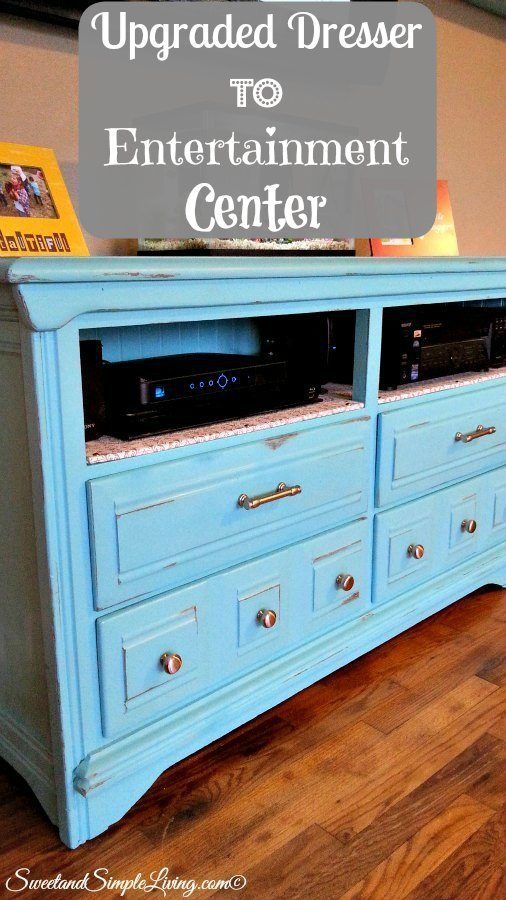
So…..if you love Pinterest like I do then you’ve probably seen some of these cute DIY entertainment centers. Well, we decided to try and do one for our living room and we LOVE it! We got it done in one weekend and it made a huge difference. Check out our Upgraded Dresser to Entertainment Center!! I’ll show you how we did our new entertainment center, but the project can totally be changed up and personalized to fit your needs.
So this is what we had before…..
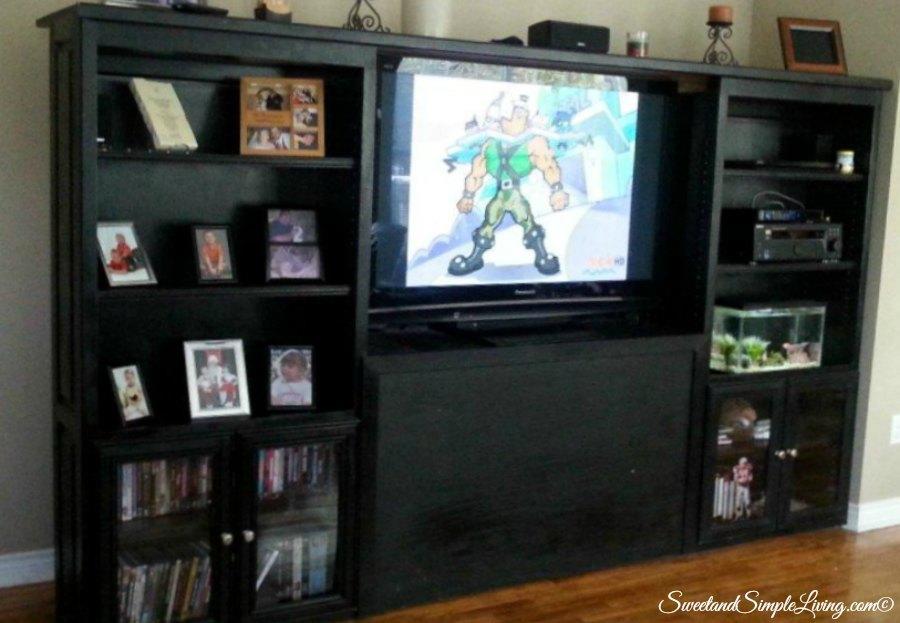
It served it’s purpose and gave me space for everything, but it was so big! Plus there was about a 1 foot gap behind this thing that we never closed in and it was such an eyesore every time I walked by it. I started the hunt for an old wooden dresser that I could get at a good price. I belong to several online garage sales on Facebook and this is where I found this little gem. I will admit it took me several months to find just what I wanted, but you may have an old dresser already that you can use. Of course, now that I have already found one, I see them all the time. We picked up this one for $25!
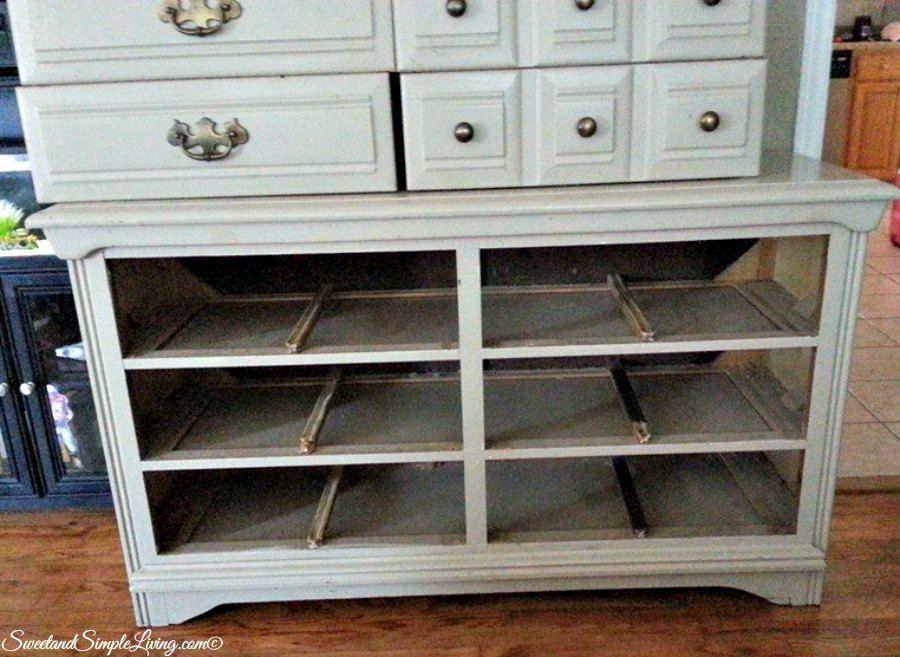
It wasn’t the prettiest thing ever, but it had character and was all wood. It had been painted over more than once, but that didn’t stop me. I am not one who loves to do a lot of prep work or who even does things the “right way” all of the time. But it either works out, or I learn a good lesson! Here is what you’ll need to make your own Upgraded Dresser to Entertainment Center!
Supplies:
- Dresser – look for one that is solid wood
- Paint in the color you want the dresser to be – I used my trusty spray paint! I use it on everything I can!
- 1 dark furniture touch up marker – I don’t remember where we got these because we have had them for a long time, but you can also order them HERE. This is used for an AMAZING trick I’ll tell you about below.
- If you are going to have shelves instead of drawers like we did, then you need 2 (or more) pieces or wood cut to fit the opening. Have the hardware store cut it for you.
- Non-stick shelf liner – we also got this at the hardware store and it has a little bit of padding. There are a lot of different colors and patterns you can find.
Optional Supplies:
- Use the hardware that is already on the dresser or grab a few new pieces. If you like the hardware, but maybe not the color of it, just spray paint it!
- You can paint the inside of the dresser (where you will have shelves instead on drawers), or line it. We had some wainscoting cut to fit the back area just as an extra detail.
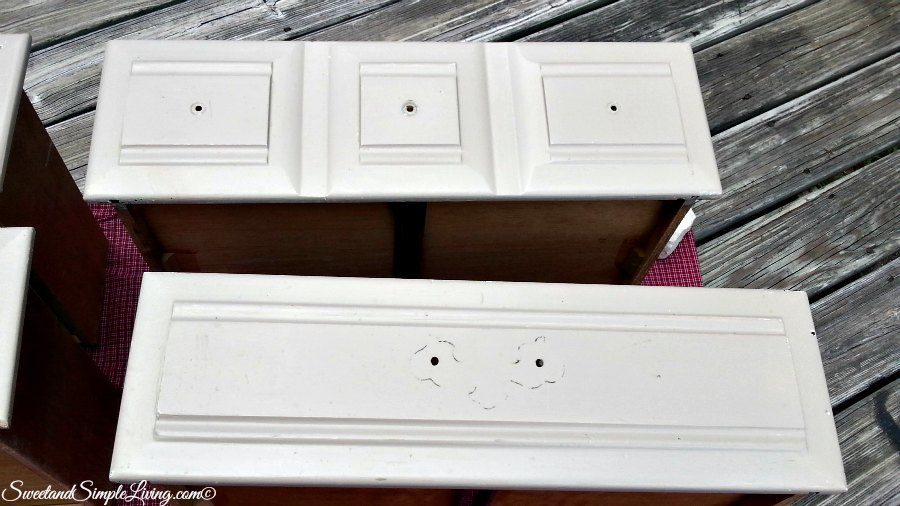
First, you’ll need to clean the dresser. I’m sure there is a proper way to do this, but I don’t know what it is and probably wouldn’t have done it that way anyway. I laid some old sheets outside, took all the drawers out, removed the hardware and wiped everything down with window cleaner! This didn’t mess up the paint that was already there and got off any surface gunk.
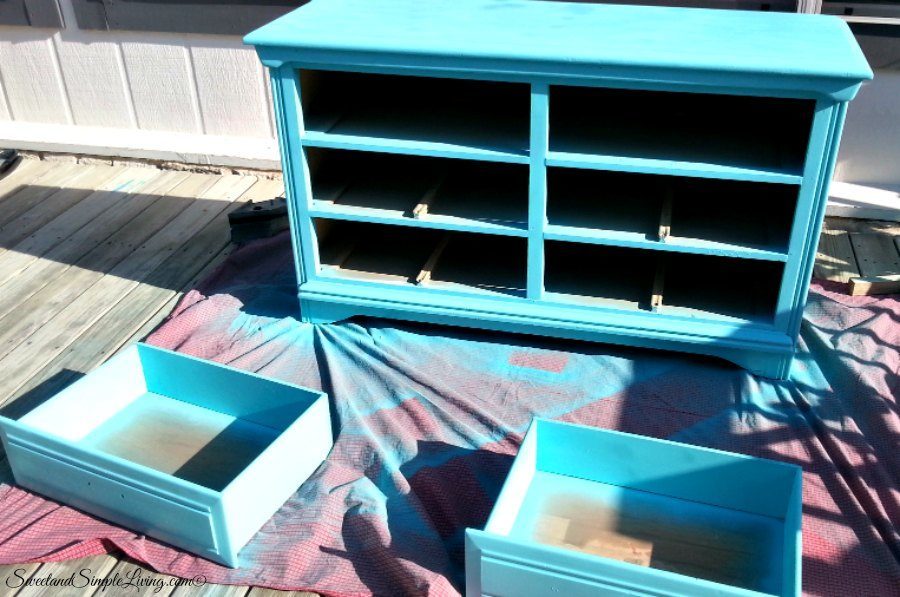
Next….START PAINTING! We spray painted everything and used Valspar Outdoor Color in Koi Pond Satin. We painted the dresser, drawers, the inside of the drawers (just the sides) and the wainscoting. I think we did two coats and just made sure everything looked even.
In-between coats, I went ahead and covered the boards that would now be shelves. Just cut the non-stick liner with about 1 inch of overhang, wrap it around the edges and use a staple gun to attach it in place. Be sure to pull it tight so that you get a smooth finish. This is the bottom of the shelf:
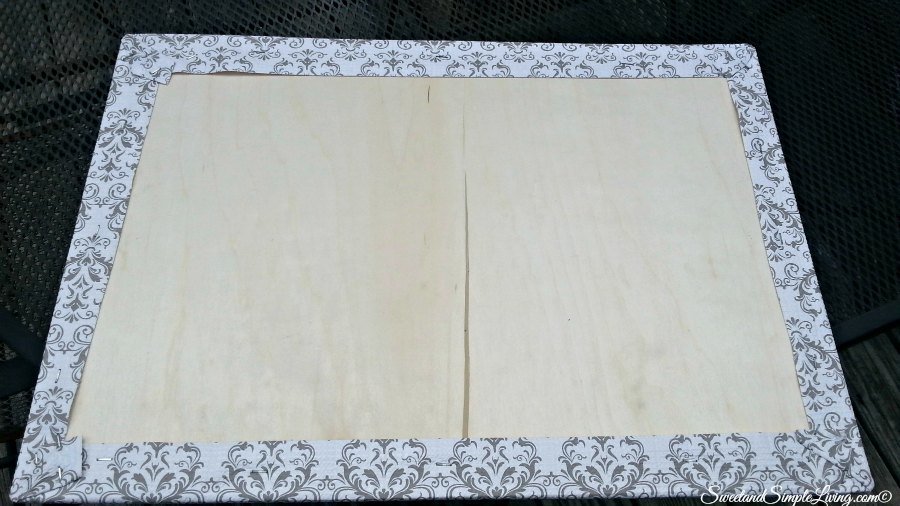
And this is what it looks like on top:
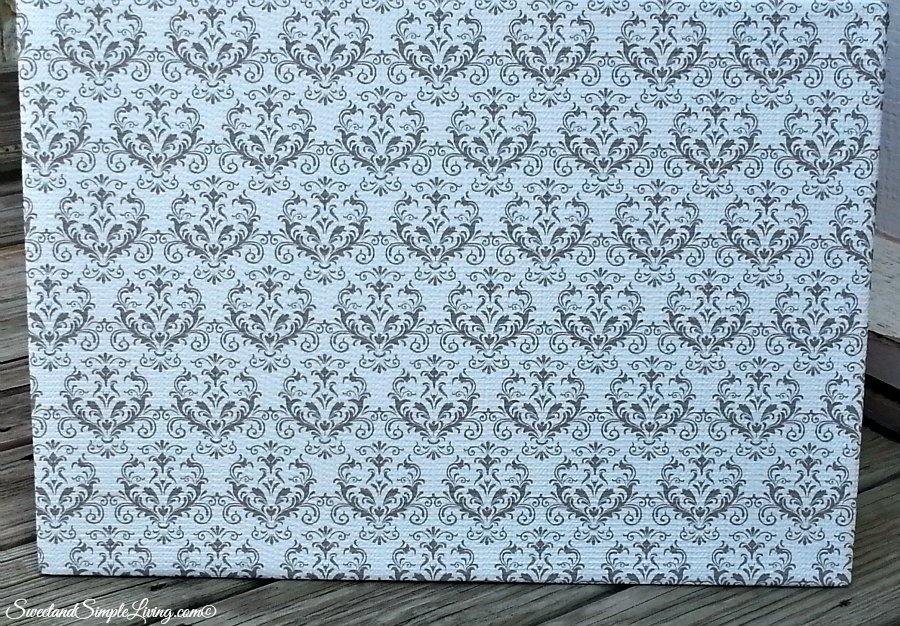
Once everything is good and dry, you can start to put it together. We did this when it was still hot here in Texas, so we left it out to dry overnight. If you are going to line the back space of the shelves (this is where we put the wainscoting), do that first. Just put it in place and use a nail gun to secure it. My husband was in charge of this part! Then slide the covered shelves in. We had some decorative finishing nails that we used to tack the shelves down with toward the front of the dresser.
There was one last step….even though we had spent the day before painting this old dresser to make it look new, I wanted the distressed look and I knew you could do this by sanding some of the paint off. I started with a small corner just to see how it looked. After several minutes of this, I was DONE! And by DONE, I mean, this wasn’t going to happen. Not only would I have to get through the paint I just put on, but the one or two layers of paint someone else had also put on before me! I found this AMAZING little trick, that I think you’re going to LOVE! This is where the furniture marker comes into place. Have a clean, dry cloth handy when you are doing this part. Use the furniture marker and draw where you want it to be distressed looking. Then take the cloth and immediately rub over the area! This takes a little bit of practice, so start small. But you will be AMAZED with how it looks!
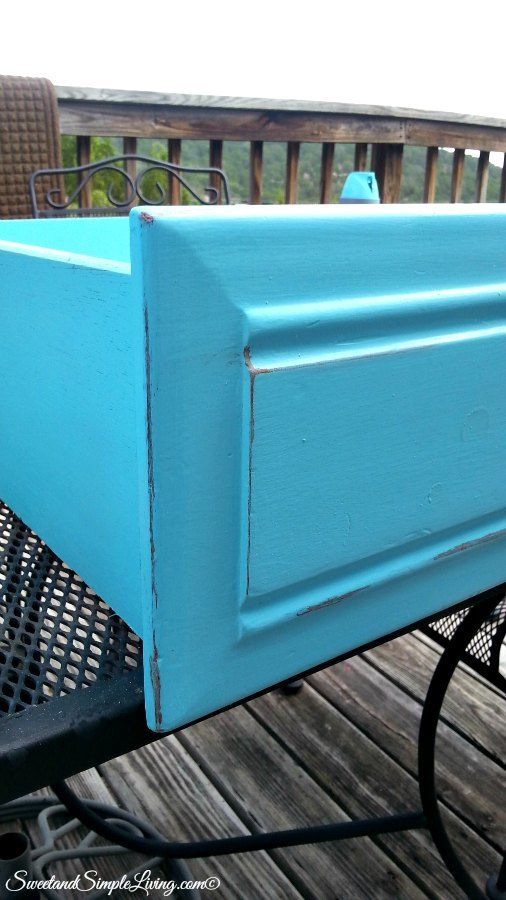
All of those distressed looking edges…that’s marker! I got better at it as I went along. And my husband was sure to tell the kids: Look at mommy! She is drawing all over the furniture that we just painted! I was sure to tell them that mommy was the only one allowed to do this! Now just re-attach your hardware and put everything in place! We had some hardware already but did purchase 2 new drawer pulls. *TIP* We put our cable box, stereo and DVD player on the top shelves so my husband just drilled some holes through the wainscoting to put the chords through.
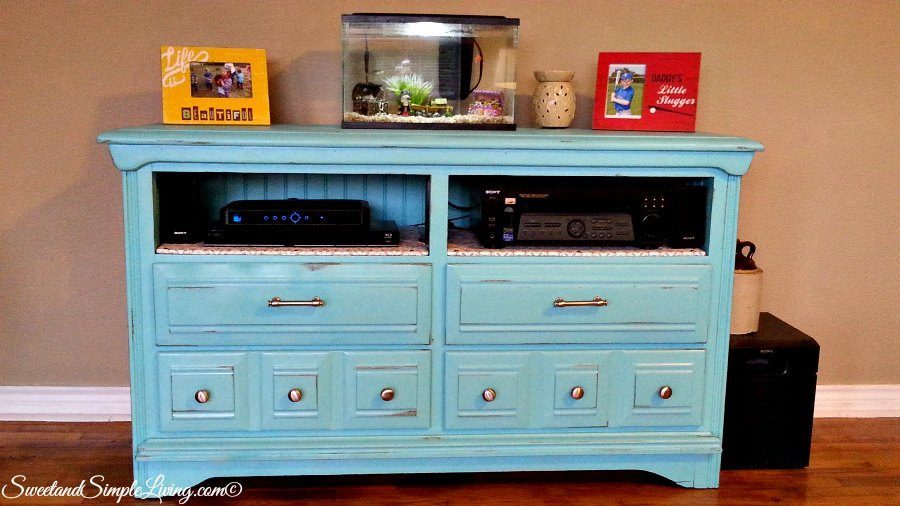
What do you think?? We LOVE it and it has made our living room look so much bigger and brighter! Wondering what we did with those extra drawers from the top? Well that’s another project that I will be sharing soon!