
Upcycled Drawers to Shelves
Upcycled Drawers to Shelves
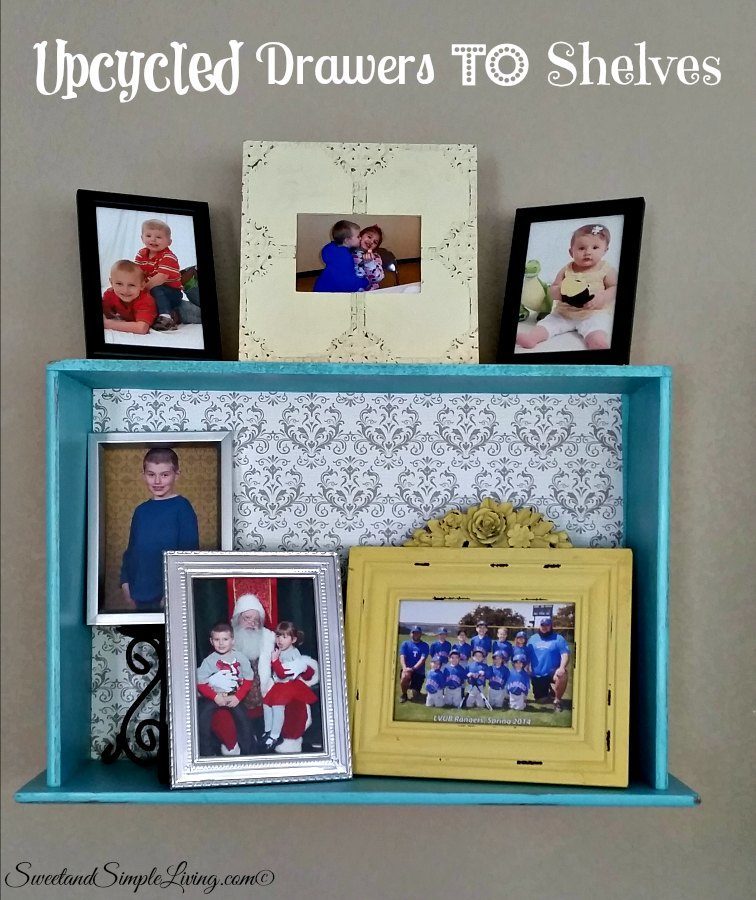
If you saw our Upgraded Dresser to Entertainment Center project I shared yesterday, then you may be wondering what we did with those extra drawers. Well, here is the answer! Check out our Upcycled Drawers Into Shelves! Aren’t they cute? We did all of the painting and lined them when we did the original project. So these went up super quick, once I got my husband to hang them!
Supplies:
- drawers – We used the extra ones from our dresser to entertainment center project we did. But you can find these at garage sales all of the time.
- paint – I used spray paint in the same color that we did the dresser.
- shelf liner or craft paper to line the back
- heavy duty picture hangers
- dark furniture marker (optional)
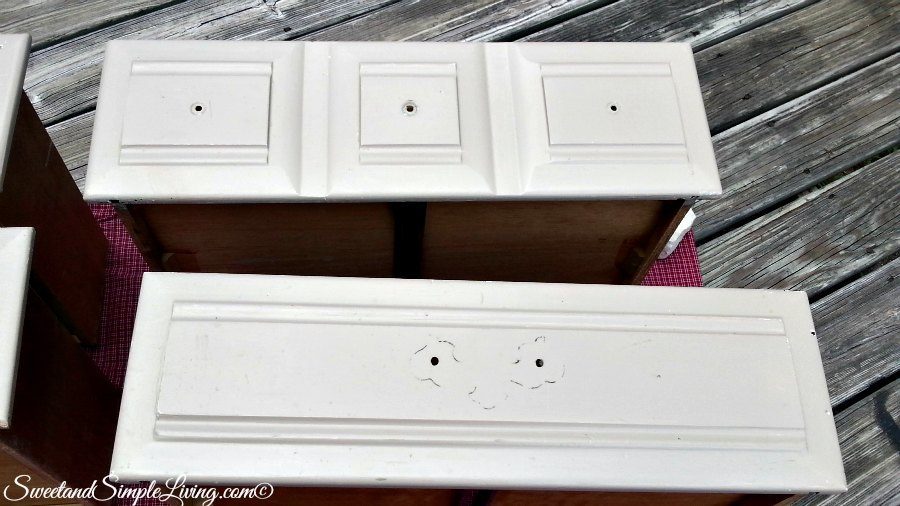
Step one was to clean the drawers. I just took some Windex and a dry cloth and wiped everything down. We removed all of the hardware before starting this.
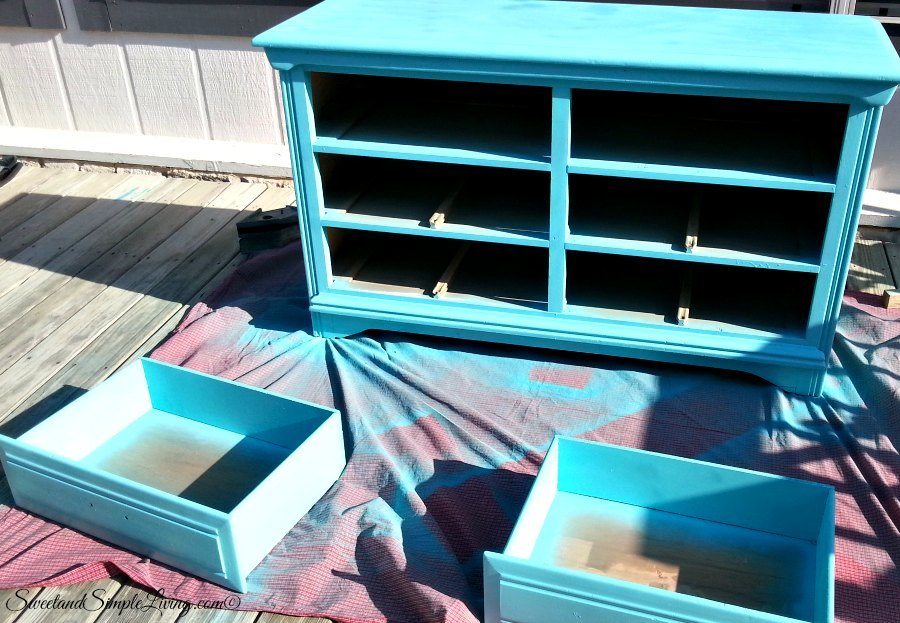
Next, we painted everything with spray paint. As you can see we did the dresser and all of the drawers at the same time. We decided which drawers would go back into the new “entertainment center” and set our spare drawers (that would become shelves) to the side.
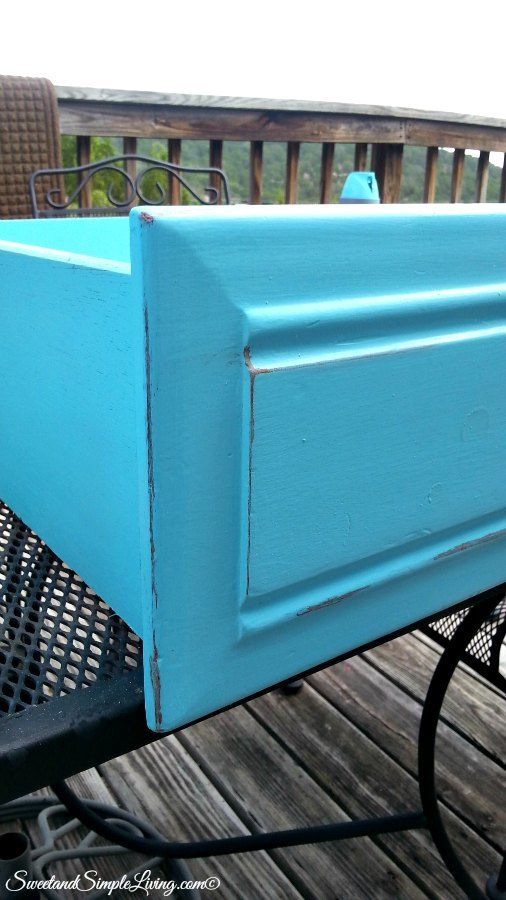
After all of the paint was dry, I started to give the drawers a distressed look. I talked about this in the Upgraded Dresser to Entertainment Center post, but I’ll cover it here again too. You can go back and sand the areas that would naturally be worn or some apply a wax or thin layer of stain to make a piece look distressed. I started to sand it down, but it took way too long. I found that you can take a dark furniture marker, draw on the area that you want to look distressed and then wipe the marker off with a clean cloth to get an amazing look. Start with a small area until you are more comfortable with how the marker goes on. This is a much easier and quicker way to achieve this look!
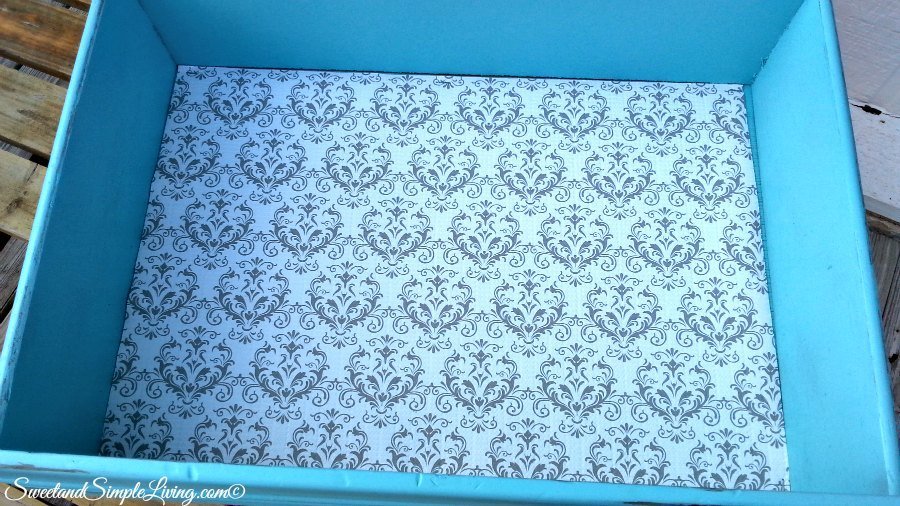
Next, we lined the “shelves” with the same padded shelf liner that we used on the dresser. I used the staple gun to attach it in there.
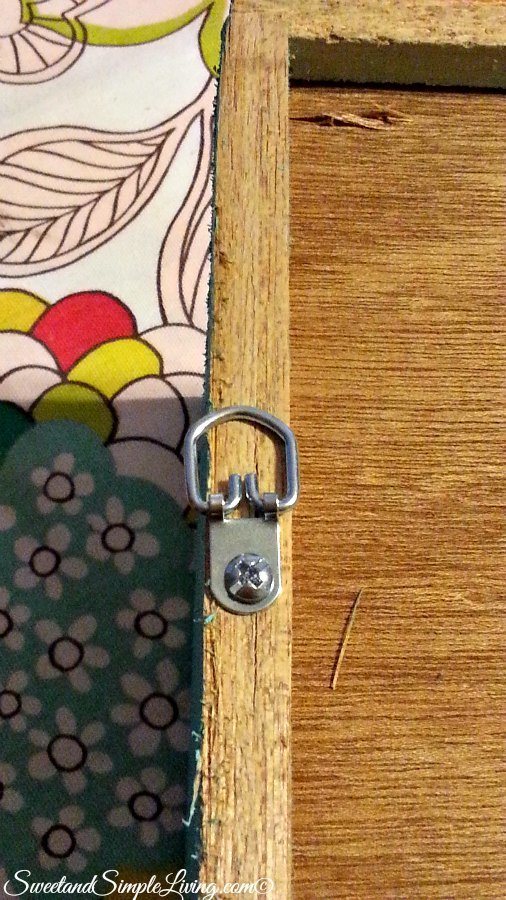
The shelves were basically done at this point, but we needed a way to hang them. So my husband attached these heavy duty picture hangers to the back.

Voila! Upcycled Drawers Into Shelves in the living room at no extra cost! We already had everything we needed from the dresser project! You can put pictures in the drawer area and on top. This is what it looked like before we added any pictures. And they may or may not have stayed like this for a week or two until I figured out and re-framed the pictures I wanted up there.
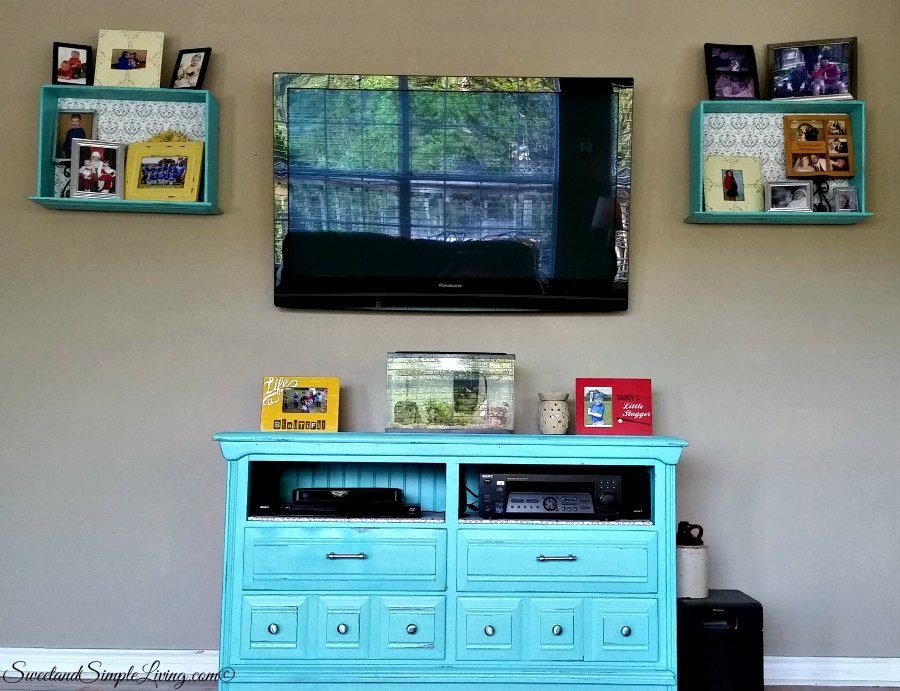
And here’s the finished project! We love it and it has made our living room look so much brighter and bigger! What do you think? I think I have turned my husband into a real lover of DIY. He doesn’t look at me like I’m crazy every time I say “so, I had this idea….”. So that’s a start right?
Enjoy!


This is a great example of how old furniture can be upcycled into a beautiful piece of furniture. Good work and thanks for sharing!